
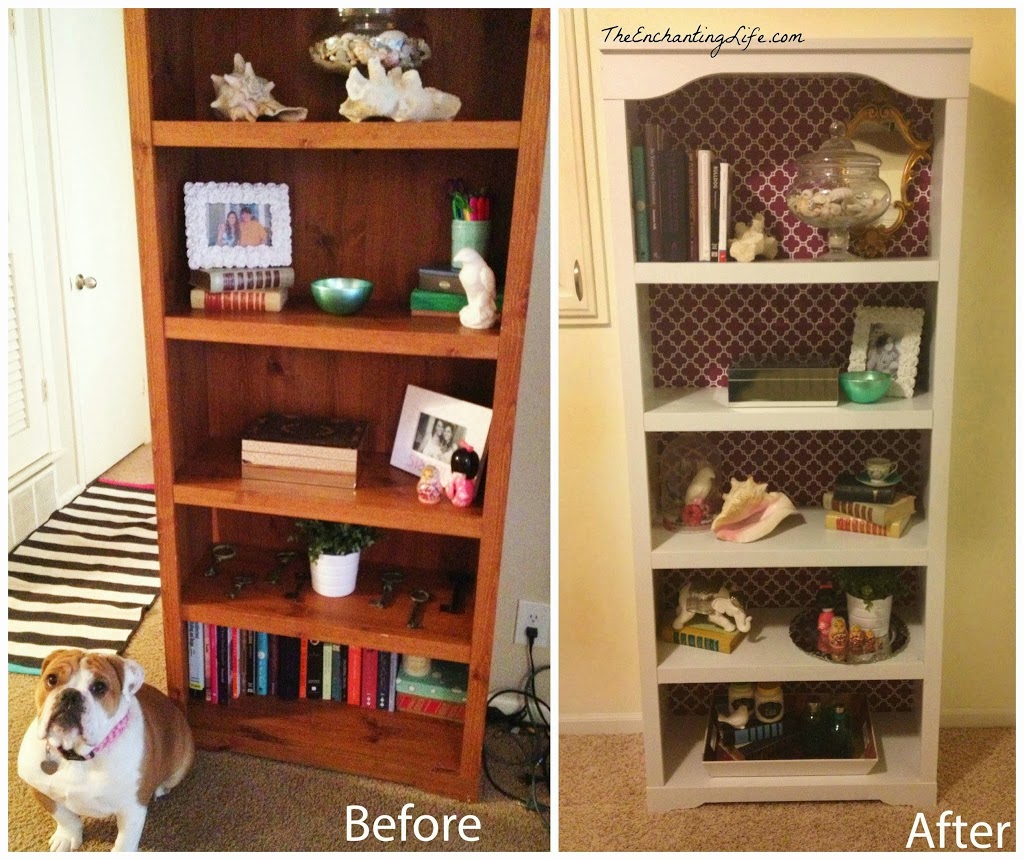
So when Jesse and I got married we inherited some of both of our things. One of the things Jesse brought to the table was an old wood plywood bookshelf. I’ve always hated it but finally he gave me the go-ahead to refinish it and I must say I’m pretty pleased with how it turned out! Here’s a quick and easy tutorial!

Supplies:
A bookshelf
Sandpaper
Can of paint (I used a $4 can of white acrylic paint from Home Depot in a medium gloss)
Paint brush
Roll of gift wrap (try Home Goods or TJMaxx)
Spray glue ($5 on Amazon or Walmart)
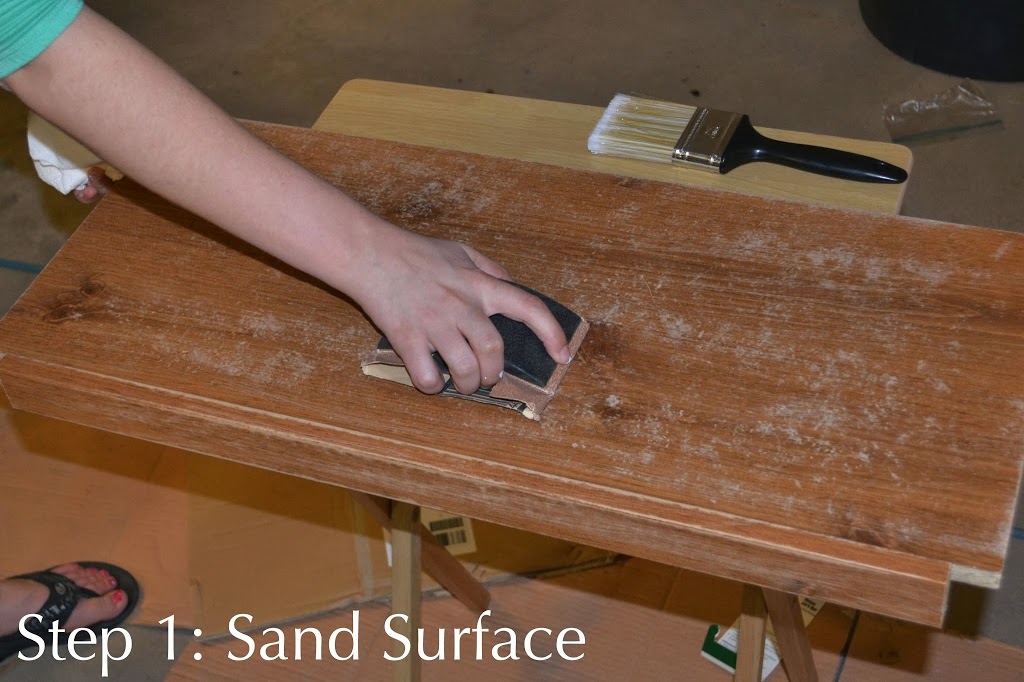
Step 1: Sand your surface to take of any veneer or finish on the wood. Make sure you’re sanding in the direction of the wood evenly across the surface. If you are working with plywood (like I was) be careful not to take off too much of the top layer and break into the actual plywood.

Step 2. Once you have a smooth and even surface, clean off any extra dust. I vacuumed up all the excess shavings then used Windex to give a final cleaning.
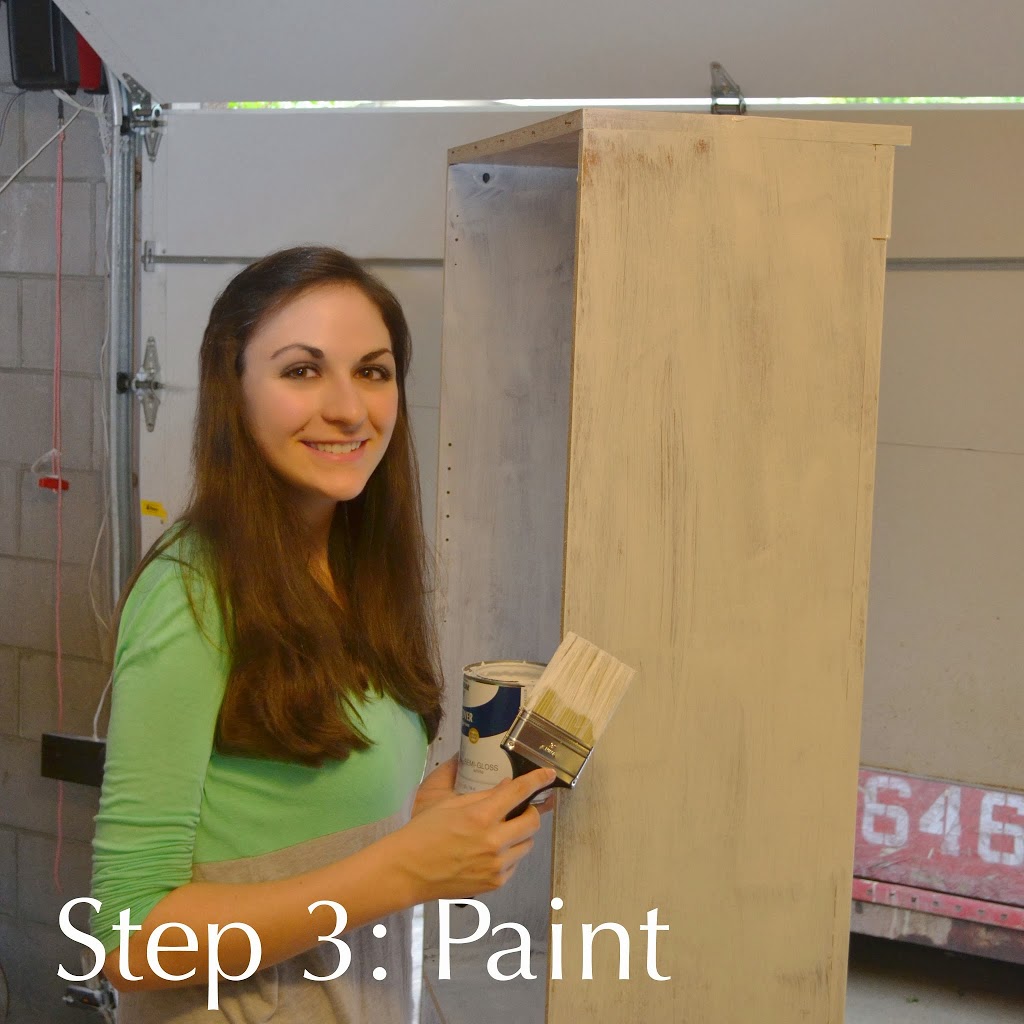
Step 3. Now you’re ready to paint! Make sure you apply thin layers to avoid uneven surfaces and let the coat dry completely before painting again. I ended up doing 3 layers (about 1/2 the can) and I lightly buffed the wood with sandpaper in between coats to make the layers even.
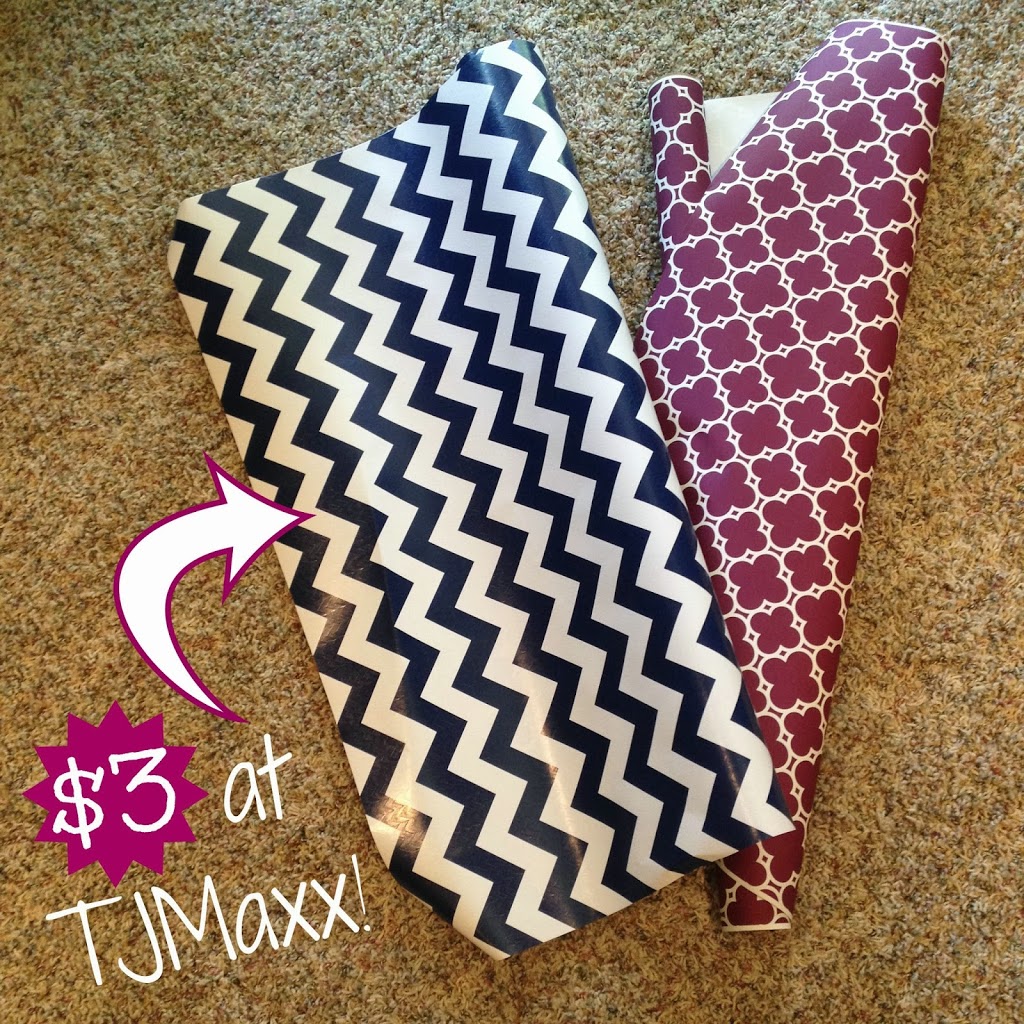
Step 4. When you are happy with the number of coats and your bookcase is completely dry, you are ready to apply your background and here’s the best part: it’s going to cost you a whopping $3! Yeah no need to buy an $80 roll of wallpaper, all you need is a patterned gift wrap roll. If you are able, remove the back piece from the bookshelf then measure and cut your paper (leaving a few inches of wiggle room). Spray the bookshelf’s back with spray glue and wait a few seconds for the glue to get tacky then slowly apply the paper from top to bottom. You’ll likely need 2 sets of hands for this part, one person to hold the paper above and the other to “steamroll” the paper down with their arm. (You could also use fabric instead of gift wrap for a more textured look. Just make sure you apply the spray glue to both the fabric and the bookshelf’s back before applying).
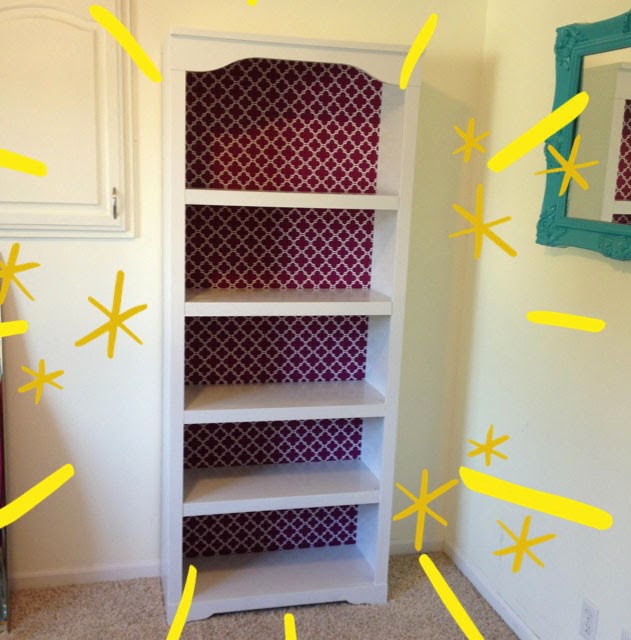
Step 5: Reattach the back to your bookcase then use a box cutter to trim off the excess paper. Voila! Easy peasy!
Let me know what you think and if you give it a try 🙂
XO,
Nat


Thank you so much for this idea! I found an old bookcase on the street and after cleaning it off, I wondered how I could make it presentable.
Now I’ve got my list and can restore it!
(Was going to show you a before pic, but unable to attach.)
Hi Connie,
I’m so glad it gave you some inspiration! Bummed it didn’t let you post a pic -maybe you could try posting the before/after on The Enchanting Life Facebook page?
Hope I get to see it!
Natalie